Pages

Thursday, December 24, 2009

Pear & Ginger muffins

Packers will be coming tomorrow to pack all d stuff, thus, tonite will be my last bake post unless it’s ABM baking related cause I don’t have oven in SG. For my last bake, I selected this recipe simply because I happened to have most of d ingredients on hand. & for tonite’s bake, I even happened to have a friend over to help out, who also became d 1st to taste it.
End result – very soft & tasty batch of muffins! Hurray! My last bake is successful! For this recipe, I actually reduced d amt of sugar & taster said that d sweetness is just right, coming mainly from d pears. Do note that it’s best eaten while still a bit warm out from oven.

  • 1¾ cup all-purpose flour
  • ½ cup granulated sugar (I used brown sugar)
  • ½ cup plus 6 tsp packed light brown sugar
  • 2 tsp baking powder
  • 1/3 cup sour cream
  • 1/3 cup whipping cream
  • ½ cup vegetable oil
  • 1 tbsp honey
  • 2 eggs
  • 1½ cup peeled & diced pears,
  • ¼ cup candied ginger, diced
  1. Preheat oven to 180C.
  2. Whisk d flour, sugar & baking powder in a large mixing bowl.
  3. In another bowl, mix sour cream, oil, honey, & eggs well be4 gently fold in into d dry mixture. DO NOT OVERMIX (note that this can be done d nite be4)
  4. Fold in the diced pear & candied ginger. Again DO NOT OVERMIX.
  5. Spoon batter evenly among the muffin cups to 2/3 full.
  6. Then sprinkle d top with ½ tsp brown sugar & bake for 20mins. Remove & allow to cool be4 eating.

Wednesday, December 23, 2009

Chocolate Cheesecake

In 2 days time, we will be packing & moving out of Bkk! Time really flies! 3yr in Bkk (including 9mths of baking) & with no future plan of getting an oven in SG, d only regret that I have is – why I didn’t try out this Chocolate Cheesecake sooner! OMG! Hubby’s ofc gals felt that it tasted just like d cheesecake from Secret Recipes! WOW! Maybe this is really a good reason to get a new oven?

Base Ingredients

  • 100g digestive biscuits, crushed
  • 1 tbsp cocoa powder
  • 1 tbsp sugar
  • 45g unsalted butter (melted)

Mix all well & press on d bottom of a 16cm spring form pan.

Fillings Ingredients

  • 110g dark chocolate (chopped)
  • 2 tbsp whipping cream
  • 250g cream cheese (room temperature)
  • ¼ cup sugar
  • 1 egg (room temperature)
  • 1 tsp vanilla extract

1. Melt chocolate in the heavy cream in a double boiler.
2. In another bowl, mix cream cheese & sugar well be4 adding in d egg & vanilla extract.
3. Then fold in d chocolate mixture. If u prefer a cake with marble effect, dont overmix.
4. Pour fillings into the spring form pan.
5. Bake in a preheated 150C oven until it is set, ard 45-60 mins.

Tuesday, December 22, 2009

Raspberry Coffee Cake

Another day of trying to ‘utilise all bal ingredients’. Long, long ago, I saved this recipe on my to-dos cause I love d simplicity of it. But then, I realised I cant find d main ingredient – Bisquick mix, in d local supermkt & recipe was 'shelved'. Then last wk, for some forgotten reason, I ‘researched’ on d word Bisquick & found out what Bisquick mix is made up of! Thus, tonite, I finally get to give this simply/easy recipe a try. Of course again, I made some changes. For example, instead of a green apple, I used frozen raspberries. And because of d frozen raspberries, I reduced d milk amt to cater for d liquid that will be released from d frozen raspberries during baking.
End result – quite a bland cake, 1 can only taste a bit of saltiness here & there (although am not sure why since I only added ¾tsp of salt). D top is a bit crusty but underneath is a very soft cake. Both Hubby & MIL prefer yesterday’s peach-a-berry tart as compared to this cake. In fact, Hubby's ofc's gals thot I forgotten to put in sugar! That's how bland it was!
  • 2 cups Bisquick mix*
  • ½ cup low-fat milk
  • 2 tbsp sugar
  • 1 egg
  • 1 cup frozen raspberries (unthawed)

* replaced with 2cups flour + 3tsp bking powder + ¾tsp of salt + 2tbsp melted unsalted butter

  1. Preheat oven to 190C.
  2. Grease 9" round pan. Mix all ingredients & spread ½ batter onto pan.
  3. Put in d raspberries & spread d rest of d batter onto of it.
  4. Bake 30 mins or until golden brown, testing with a toothpick.

Monday, December 21, 2009

Peach-a-Berry tart

Another interesting recipe for me to utilize some of my bal ingredients – Peach-a-Berry pie. As usual, I made some changes in order to finish up my ingredients. Also, recipe requires 2 pie crust but I only used 1 as base, thus, my pie is kind of ‘topless’, looking more like tart than pie.
End result – a very ugly looking pie but taste GREAT! D sour taste of d raspberries adds a very nice ‘touch’ to d overall sweetness of d pie. D bal streusel topping that I added on top also added a crusty ‘bite’ to d pie, which to me, is a nice additional too. But might slice up d peaches next time in order to make it look better. Or maybe it's supposed to look so ugly, thus, d need for a 2nd crust to cover it up... mmmmm

  • 1 can of halves peaches – drained
  • 1 cup frozen raspberries – thawed & drained
  • ½ cup white sugar
  • 3 tbsp all-purpose flour
  • 1 tsp ground cinnamon
  • 1 pie crust
  • ½ cup Streusel Topping

1. Preheat oven to 190C.
2. Gently mix peaches & berries with sugar, flour, & cinnamon. Transfer all onto d pie crust. Sprinkle with streusel toppings be4 spreading thin slices of unsalted butter across d top.
3. Bake 50 mins in d preheated oven, until crust is golden brown.

Friday, December 18, 2009

Nutella Cheesecake w/pie crust

OMG! I have 3 blocks of Phil cream cheese to finish up within 1 wk be4 our big move back! OMG! Thus, shortlisted these 2 recipes for testing. Recipe does not required blueberries but I added whatever bal I have in my freezer to finish it up.
End result – d crust does not goes well with d cheesecake fillings cause it needs to be bake longer. Thus, will definitely need to blind bake it first if planning to use it for cheesecake fillings again. Other than that, both testers love it. In fact, Hubby took 3 slices!

Pie Crust ingredients
  • 1¼ cups all-purpose flour
  • ¼ tsp salt
  • ½ cup (113g) unsalted butter, chilled
  • 4tbsp ice water

Whisk flour & salt in mixing bowl be4 cutting d cold butter into d mixture with a pastry blender. Stop once mixture resembles coarse crumbs. Drizzle ice water over flour tbsp by tbsp until d dough comes together. Wrap dough in plastic wrap & chill for minimum 30mins be4 rolling it out into crust base. Blind-bake it for at least 20mins @ 170C be4 adding fillings.

Cheesecake Fillings ingredients

  • 1 block (250g) Philadelphia Cream cheese, softened
  • ¼ cup sugar
  • ¼ tsp vanilla
  • 1 egg
  • 1 tbsp nutella
  • some frozen blueberries

Whisk cream cheese & sugar until well mix. Then add egg & vanilla till well blended. Lastly, stir in nutella. Don’t over-mix so that u can c a slight marble effect. Pour fillings onto crust & tap it to even out d fillings across d crust. Bake in d pre-heated oven for 20min @ 170C. Allow to cool be putting it into d fridge for 2 hrs or overnite be4 serving.

Thursday, December 17, 2009

Apple Soup

Another simple recipe from Mon's Crazy Kitchen, again, to use up bal ingredients.
End result – a very, very sweet soup due to d apples. Might increase more onions next time through.

  • 5 small Gala apples (cut into chunks)
  • 15 red dates (de-cored)
  • 1.4 liters water
  • 450g ribs (washed & scalded)
  • 1 Yellow onion (peeled & cut into chunks)

Put all ingredients into d pot & bring to boil. Lower heat & simmer for abt 2hrs.

Wednesday, December 16, 2009

Peanut soup w/ribs

Another easy recipe from Mon's Crazy Kitchen to use up bal ingredients. I only used 5 med size scallops & its alrdy sweet enough for my family.

  • 5 med size dried scallops (can increase to ¼cup if desired)
  • 1½ cup peanuts (washed)
  • 1.4 liters water
  • 500g ribs (washed & scalded)
  1. Pour d water into d pot & soak d scallops in it for ard ½hr.
  2. Then put rest of ingredients into d pot & bring to boil.
  3. Lower heat & simmer for abt 2hrs or more if u prefer softer peanuts.

Tuesday, December 15, 2009

Hayden’s 1st sch dance

Today was Hayden’s 1st sch dance! He did well till he saw me in d front trying to capture pix of him dancing. He actually stops dancing & started shouting “Mummy! Mummy! That’s Mummy!” OMG! OMG!

Monday, December 14, 2009

ABC Soup

As we are due to move back SG in 2 wks time, am trying to finish up all the ingredients in the kitchen/fridge. So I went surfing for recipe again & found this interesting soup recipe. However, I was not able to locate d reason why it’s named “ABC soup”. As stated in most blog/post, d main ingredients do not all start with the letters A, B and C, so most ppl also do not know why it’s called “ABC soup” too.

Anyway, it’s super easy enough for me to give it a try & end result – a very sweet tasting soup indeed!

Ingredients (Serves 2-3)

  • 400g pork ribs
  • 1.5 liters water
  • 2 small onions (cut to chunks)
  • 3 small carrots (peeled & cut to chunks)
  • 4 stalks celery (cut to chunks)
  • 1 sweet corn (cut to chunks)
  • 10 cherry tomato (optional if u prefer a little tangy taste)

Directions
1. Blanch pork ribs in boiling water for about 5 mins be4 rinsing with cold water. Remove & set aside.
2. Put all ingredients into a pot. Bring to boil be4 lowing d heat & simmer for another 2hrs.

Cinnamon Cranberries bread

As mentioned in my previous post, am trying to finish up as much bal ingredients as fast as I can be4 d big move. Thus, I modified this recipe a bit to include whatever I can ‘throw’ in.
End result - very tall & soft loaf with only a slight tangy lemon after-taste.

  • 1 cup low-fat milk
  • 3 tbsp unsalted butter
  • 3 cups bread flour
  • 4 tbsp sugar
  • 1½ tsp salt
  • 2 tsp ground cinnamon
  • 2½ tsp yeast
  • ½ cup dried cranberries
  • Grated zest of 1 lemon

Put all ingredients into d ABM according to made. Select basic with light crust setting & start.

Tuesday, December 8, 2009

Cornflakes Cookies

When I saw BH’s post on d cornflakes cookies, I was very eager to try cause I, too, has many bags of cornflakes in my freezer. However, as usual, I made some modification due to limited ingredients on hand. For example, recipe requires self-rising flour & since I have none, I decided to search d web for a solution & found this instant fix recipe.
End result – very crispy cookies but a bit too sweet for my family. Can u c d star cornflakes?
(A)
100g unsalted butter (melted)
1 normal size egg (ard 53g)
¼ cup sugar + 1/8 cup sugar
1 tsp vanilla extract

(B)
1¼ cup all-purpose flour
1½ tsp baking powder
½ tsp salt
1½ cup cornflakes

1. Mix (A) & (B) in separate bowl first. Then mix them together well in a big mixing bowl.
2. Use 2 tsp to round d cookie dough onto small paper case.

3. Bake at preheated 160C oven for 10-15 mins.
4. Let cookies cool in pan for 5 mins be4 moving it to cool completely on a wire rack.
5. Store in air-tight container.

Wednesday, December 2, 2009

Water Roux starter loaf

Had some water roux starter left & decided to use it for the bouncy cheese loaf again. However, this time, I didn’t sprinkle any cheese on top. Also I adjusted some of the wet ingredients cause I only have 70g of water roux starter.
End result – still bouncy & fluffy! Am so happy that I gave this another go!
  • 200g Bread flour
  • 100g Cake flour
  • 2tsp (6g) yeast
  • 1tsp (6g) Salt
  • 2tbsp (30g) Sugar
  • 1 large Egg (est. 60g)
  • 60ml low-fat milk
  • 70g Water Roux Starter + 10g whipping cream
  • 45g unsalted Butter

Put ingredients into ABM as per manufacturer's instruction & select normal white bread setting with light crust.

Monday, November 30, 2009

Vanilla SourCream bread

Another interesting ABM recipe which turn out very well - super fluffy & tall loaf! Another keeper. As usual, I made some changes so u might want to go back to d original post if this does not work out.

  • ½ cup low-fat milk
  • 1 tbsp vanilla extract
  • 1/3 cup sour cream
  • 1 large egg
  • 1 tbsp butter, softened
  • 3 cups bread flour
  • 3 tbsp sugar
  • 1 tsp salt
  • 2 tsp yeast

Put ingredients into ABM as per manufacturer's instruction & select normal white bread setting with light crust.

Thursday, November 26, 2009

Pandan Milk bread

Had this recipe on my to-dos list for d longest time because I didn’t have a loaf pan with a cover. So tonite, I decided to go ahead & bake this in my ABM instead. With a twist, I added pandan water instead of pandan essence. Also, I didn’t want to waste d rest of d egg so I leave d whole egg & reduced d milk instead.
End result – a very ‘springy’ loaf (holes in d pic proof that)! Cant really c d pandan green & also not much of a pandan taste but ‘springy’ enough for my family. However, it does not freeze well. But still a keeper!

  • 52g low-fat fresh milk
  • 66g pandan liquid
  • 60g egg (1 large egg)
  • 25g caster sugar
  • 5g salt
  • 250g bread flour
  • 4g Instant yeast
  • 38g butter (unsalted)

Put ingredients into ABM as per manufacturer's instruction & select normal white bread setting with light crust.

Wednesday, November 25, 2009

Awesome Crusty Bread

With no eggs in d fridge, I went online searching for a bread recipe that’s does not require egg & decided on this Awesome Crusty bread, simple & easy ABM recipe.
End result – true to its name, awesome & crusty! & with my newly bought yeast, d loaf rise high to only miss d ABM cover by ½ inch! & it's so diff to slice due to its softness & height! Definitely a keeper!

  • 1 cup low-fat milk
  • 1tsp yeast
  • 2 tbsp (28g) unsalted butter
  • 2 tbsp sugar
  • 1 tsp salt
  • 2 ½ cups (300g) bread flour

Put ingredients into ABM as per manufacturer's instruction & select normal white bread setting with light crust.

Sunday, November 22, 2009

Banana Bread

Have not done my groceries shopping, thus, still no ‘active’ yeast on hand. And with a branch of over ripping bananas on hand, I decided to give this banana bread a try. It’s really a very super easy/simple recipe from 1 of my fav must-visit blog – Joy of Baking.com. I have tried many recipes from this blog & have been 85% successful so far. Thus, I was actually quite eager to try this out as I have actually put this in my to-do list for quite a while now.
End result – a super moist texture cake with soft crust! And the smell is so, so heavenly! I actually baked this in my ABM & went out for dinner be4 d baking cycle has completed. Imagined our surprised when we entered d hse smelling of banana after our dinner! It was simply lovely!

Hubby took a slice as dessert & was quite surprised that d crust is so soft.

  • 1¾ cup(230g) all-purpose flour
  • 120g white sugar (alrdy reduced)
  • 1 tsp baking powder
  • ¼ tsp baking soda
  • ¼ tsp salt
  • 1 tsp ground cinnamon
  • 2 eggs, lightly beaten
  • 110g unsalted butter, melted & cooled
  • 355g ripe bananas, mashed well (abt 1 cup)
  • 1 tsp vanilla extract
  1. Mix d shifted dry ingredients in a big bowl & set aside.
  2. Mix d wet ingredients in another bowl.
  3. Be4 mixing, start up d ABM on d baking cycle.
  4. Fold in d wet mixture into d dry ingredients lightly, ensuring not to OVER mix.
  5. Pour d batter into d ABM pan without stopping or pausing d alrdy started baking cycle.
  6. If u prefers a much softer crust, just leave d loaf in d ABM after d cycle ends. D moist collected during d cooling period of d ABM will moist d crust further.

Thursday, November 19, 2009

'Dead' Yeast

As my past 4 days of baking from d ABM were quite flat, I decided to do d yeast test today & found out that my half pkt of bal yeast is 'dead'! No wonder my breads were flat!

So I decided to give this soda bread recipe a try. End result – still flat loaf & d base of d bread were quite chewy… really not sure what’s wrong... am I losing my touch on baking...

Then I realised that I have throw it away without taking a pic of it first so no pic today on this post. And since my bake was not successful, I decided not to post d recipe in case I ruined d originator's reputation...

Tuesday, November 17, 2009

元肉雞湯

After 2 mths of Hot Yoga & reducing my food intake, my weight still floats betw 59k (on good days) & 61kg (on worst days). With not much improvement in my weight, I decided to give this soup therapy a try.
From d pic, it's looks oily but it's actually not oily at all. But it's quite sweet due to d dried longan meat.
元肉雞湯
雞肉 (切片) 四兩 Ckn meat 200g (washed & sliced) I replaced with pork ribs
當歸 八錢 Angelica roots 4-5slices (washed)
龍眼肉 一兩 dried longan meat 50g (washed)

將所有材料放入燉盅內,加適量的水,燉盅加蓋,隔水用文火燉三小時,最後調味即可飲用。
Put all ingredients into a stew pot. Add enough water to cover all ingredients. Cover & double boil for 3hrs. If desired, add seasoning be4 drinking.


李醫師指出此湯有養血活血和美容養顏之效。如你感消瘦無力、頭暈和面色乾枯,可試飲用。Recipe is provided by Dr Lee Nam, who stated that this soup is nourishing & promotes blood circulation & has the effect to improved 1’s appearance/color. If you feel unable to lose weight, or feel dizzy, or has withered/dried-up complexion, do give this soup a try.

Beef Bulgogi

For tonite’s dinner, I tried beef bulgogi but I think I might have used d wrong kind of beef, thus, end result – very tough beef. However, d onions & mushroom were very nice. D sauce is also very good to be eaten with rice.
330g sliced beef (marinated)
200g Shiitake
1 large or 2 small onions
6-7 cloves of garlic

Marinate with beef for 1hr


1 tbsp dark soy sauce
1 tbsp light soy sauce
1 tbsp seasame oil
3 tbsp mirin
1 tsp sugar
1 tsp paprika
  1. Saute onion/garlic in olive oil for few mins till tender.
  2. Add marinated beef & stir well to break up d beef.
  3. Stir-fry till beef is cooked.
  4. Serve over rice.

Monday, November 16, 2009

Oreo Cookie Bread

Another new & interesting ABM bread recipe. End result - loaf didnt rise as high as stated in d original post. It’s soft but not that creamy. Not sure if that’s because I replaced the egg with whipping cream since I run out. No matter what, Hayden loves it!

  • 250g bread flour
  • 170g fresh milk
  • 25g whipping cream
  • 20g sugar
  • 3g salt
  • 55g oreo cookies (crushed)
  • 10g unsalted butter
  • 1tsp yeast

Add milk into ABM be4 adding d cookies. Then add rest of ingredients according to manufacturer's instructions. Selec basic setting & start.

Wednesday, November 4, 2009

Yogurt Cake_II

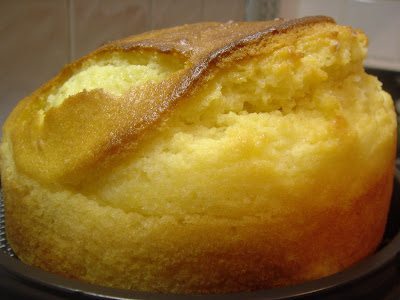
Previous attempt on d yogurt cake was not quite successful (in my eyes) simply because it has not raise as high as d original recipe has stated. So when my neighbour pass another Thai snacks to my son, I decided to bake d yogurt cake again & give it to her in return for her nice gesture.
This rd, I sit down & went through d
originator’s post again to review what I might have done wrongly in my 1st attempt in order to ensure no more flat cake. D only diff I found was that I used a 20cm square baking pan instead of a 20cm springform tin (which I am assuming its round as shown in her pic). So for my 2nd attempt, I decided to use my 16cm round baking pan instead. Also, this time, I shifted d flour & baking powder twice. I also omitted d zest as I don’t have any on hand.
End result - it worked! D cake rise nicely, even through still not as high as d original but good enough for me… ;-p I didn’t get to taste it cause it’s gg to my neighbour but am still happy that it looks more like a cake than a flat bread.

SB Marshmallow Cake_III

Hubby’s ofc gals requested for d Strawberry Marshmallow cake so I checked for ingredients. No normal UHT milk but lots of strawberry pkt milk, no red/pink color jello but got blue (berries flavour) color jello… mmm… I went ahead & made it. So here’s a diff color version of d SB MM cake (no-bake).

Monday, November 2, 2009

Yogurt Cake

With limited time on hand, I decided to try out this 'instant’ fix recipe. It’s stated that this is a very, very simple recipe & even a 4yr old can bake it. However, mine end pdt does not look like d original pic at all! Maybe I really shd attend baking class instead. I have also reduce d sugar amt to suit my family.
End result - both MIL & hubby still commented it’s still too sweet for them... sigh…

½ cup of yogurt
1½ cups of plain flour
1½ tsp baking powder
Pinch of salt
¾ cups of caster sugar
79g of unsalted butter (melted)
3 eggs
Zest from 1 lemon

Preheat the oven to 170°C.
Line a 20cm baking pan with baking parchment.
Put yogurt, flour, baking powder, salt & sugar in a large bowl. Mix in d oil & eggs be4 adding d zest.
Pour batter into prepared pan & bake for 30-35 minutes or until a toothpick inserted into centre of cake comes out just clean.

Corn tonic soup_玉米滋补汤

With everyone in d family falling sick, there was no grocery shopping during d wkend. Furthermore, all of us have not got our appetite back so I better cook something simple. Thus I have to make do with withever I have in d fridge for tonite’s dinner. With limited ingredients on hand, this soup therapy recipe is d only recipe that I have almost all d ingredients.

玉米滋补汤Corn tonic soup

材料1 (洗净, 切段)
玉米 : 3 – 4条 Corn
红萝卜 : 2条 Carrots

材料2
枸杞子 : 15 – 30g Wolfberries
玉竹 : 30g
P. odoratum

材料3
鸡肉/排骨 : 200 – 300g (川烫过) chkn meat/pork ribs (washed & scalded)

方法
1) 枸杞子, 玉竹洗净, 用水浸泡30分钟

Wash ingredients (2), then soak in water for abt 30mins
2) 加入玉米, 红萝卜和鸡肉, 大火煮开后, 转小火煮2 – 3 小时, 加入少许盐即可
Add rest of d ingredients, bring to boil be4 switching to low heat for 2-3hrs. Add salt if desired.
功能
有滋补强壮, 健脾开胃的功效
There is strengthen & nourishing effect on the spleen, efficacy in whetting/increase 1’s appetite
可日常饮用, 不燥不滞
Can be taken daily, it’s not dry/parched or sluggish

Sunday, November 1, 2009

Dried Fig Muffins

Hayden has been sick with diarrhea & vomiting after his sch Halloween’s party. And he’s not eating at all because he was aware that he will be vomiting them out later. Thus, within 2 days, he has lost almost 1kg! Even d doc suggested putting him on drip in order to ensure he does not dehydrate further & stress out his kidneys. But in d end, hubby decided to take him home & try medication instead. So, with Hayden not eating well, I went online to search for something to bake that will have a strong taste to get Hayden interested in eating again.
That’s when I saw this interesting muffin receipe from HHB’s blog & since I love figs, I decided to give it a try. But as usual, I made some adjustment to it to reduce d sweetness since d originator stated in her post that it’s still too sweet for her even after she has reduced d amt.
End result – Hayden ate ½ muffin! Hubby commented that d muffin texture is ok but it’s too sweet for him & he does not like it at all. I informed him that I have reduced d sugar amt by 1/3 alrdy & d sweetness is from d figs. Well, cant go rd & please everyone. Since d main aim is to get Hayden to eat, I will consider this a success…
Yield 9 muffins

  • 205g dried figs (de-stem & cut quarters)
  • 90g unsalted butter
  • 250ml apple juice
  • Grated zest of 1 lemon
  • 315g plain flour
  • 2½ tsp baking powder
  • ½ tsp salt
  • 125g sugar
  • 2 eggs, lightly beaten
  • 1½ tsp vanilla extract

Method:
1. Heat juice & butter in a saucepan over low heat until butter has melted.
2. Remove from heat & add in figs & zest. Leave to cool for abt 1hr or till figs r softened.
3. Preheat oven to 170C.
4. In a mixing bowl, stir together flour, sugar, salt & baking powder.
4. Make a well in d centre & add all d wet ingredients. Stir until just combined with d batter still slightly lumpy. Do not over-mix.
5. Spoon batter into muffin cups, filling to d rim of d cup.
6. Bake for abt 25-30 mins or until golden. U can also insert a toothpick into d centre & it’s done when toothpick comes out clean. Transfer muffin onto cooling rack & leave to cool completely.

Thursday, October 29, 2009

Seduction Brownies

Tomorrow is Halloween & Hayden is required to bring 1 dish to his sch party. So here I was, searching for a easy recipe to try out, when I went back to Cookie Baker Lynn’s blog. She really loves brownies & as I was browsing through, I saw a rather simple recipe that I think I shd be able to handle so here goes - Seduction Brownies.
It’s really a very easy recipe but am not sure why my brownies does not look like d original pics. At first, I thot it might be because I didn’t prepare d ganache (didn’t want d kids to get too much chcocolate). Then I realised d round baking pan might be d reason. D brownie came out with BIG cracks all around & d inside r still slightly wet. I was still trying to figure out whether to consider this a failure when Hubby happened to walk in & saw it. He’s a chocolate fan & requested for a slice so I cut 1 for him to taste. He loved it! MIL also tried a bite & find it very bitter at first, followed by a sweet taste after it has ‘flow’ down her throat. Interesting cause I have alrdy reduced d amt of sugar. Mmm….
But now with a slice in my hubby’s tummy & cracks all over it, I cant send this to Hayden’s sch. So I baked another 1, this time using d same size pan as stated in d original post – 20cm square baking pan. This time, d brownie looks so much better than d 1st attempt & there is no visible cracks on d brownie after it’s be remove from d oven! Hurray! Even though it still looks flatter as compared to d original pics but shd still be consider a success (at least to me) ;-p

Hubby's ofc gals commented d rd brownie is not soft enough. However, Hayden's sch loves d flatter brownie. So I guess I shd be baking this in d square pan next time.
115g unsalted butter
115g unsweetened chocolate chips
¾ cup sugar
2 eggs
1 tsp vanilla extract
¾ cup or 105g all-purpose flour
½ cup or 65g chopped almonds

  1. Preheat oven to 140C. Butter an 20cm square baking dish.
  2. Melt butter & unsweetened chocolate in a double boiler, stirring often.
  3. Once melted, remove from heat be4 stirring in d sugar, followed by eggs & vanilla extract.
  4. Fold in d flour & nuts, stirring just till incorporated. Scrape batter into prepared pan & smooth d top.
  5. Bake for 25 mins. Cool completely on a wire rack be4 cutting.

Wednesday, October 28, 2009

清热滋阴杂菜汤

This is just another soup therapy from Violet Fenying 陈粉樱's blog. I have always love to visit her blog simply because she posts lots of soup therapy recipe that's provided by 郭美伶医师(Dr. Guo Meiling) TCM. The recipes are usually very simple & easy to prepare. You just need to ensure that u know where to get some of d Chinese ingredients that’s usually required. But in this recipe , most can be found in normal supermkt.

清热滋阴杂菜汤

材料 (ingredient) (as shown in d pic)
(a)
排骨 : 500克 (洗净, 川烫过) Pork ribs, 500g (wash, scalded)

(b)
姜 : 1块 (拍扁) Ginger, 1piece (pat flat)

(c) 洗净, 切段 wash & slices
莲藕 : 1节 Lotus root, 1 section
牛蒡 : 1条 Burduck, 1 stick
玉米 : 2条 Corn, 2 stick
胡萝卜 : 3条 Carrot, 3 pc

方法Method
1) 将川烫过的排骨放入砂锅中, 加入水盖过表面
Put scalded ribs into casserole & add enough water to cover d surface of d ribs
2) 放入拍散的姜及材料3, 大火煮开后, 转慢火煮1小时 至汤汁变成白色
Place rest of ingredients into casserole & bring to boil. Then switch to low heat & simmer for 1hr or till it turns into a white sauce.
3) 加入盐调味即可 If desired, add salt be4 serving

功能Function
滋补清热, 常食用可补益身体
Nourishing & clear internal heat, beneficial to health/body when consume frequently
助消化, 保持大便通畅

Aid digestion, also helps maintain smooth stool

Tuesday, October 27, 2009

Peanut Butter Bread

This is another recipe from HHB's blog & it’s an ABM recipe! I printed it out immediately & give it a try. It produced very wet dough but since no shaping is required, I didn’t add any additional flour to bal it out.

End result – a very soft & nutty loaf. Hayden & Hubby loves it but MIL commented that it tasted weird.
  • 300ml low-fat milk
  • 3 tbsp crunchy peanut butter
  • 1 tbsp veg oil
  • 450g (3 cups) bread flour
  • 1½ tsp salt
  • 2 tsp caster sugar
  • 2 tbsp dried skimmed milk powder
  • 1¼ tsp instant yeast

Put ingredients according to ABM manual & select Basic White setting with light crust. Start.

Monday, October 26, 2009

Yogurt Bread

I have tried 3 diff yogurt bread recipes so far & have not found a ‘GREAT’ keeper yet. So when I saw this recipe on HHB’s blog yesterday while waiting for d honey buns to finished baking, I decided to give it a try next day (which is today). However, I decided to change some of d wet ingredients because I need to finish up d bal drinking yogurt. Also, her post mentioned dividing d dough into 3 loafs but to me, d dough seems too small to be divided into 3 but I decided to follow ‘instruction’. Also, 8mins into d kneading phase in d ABM, I noticed that d dough is just too wet so I added 4 tbsp of cake flour. It also took longer than usual on d 2nd proofing.
End result – very soft but I cant taste d mixed fruits yogurt flavour at all!


  • 250g bread flour
  • 15g sugar
  • 3g salt
  • 1 tsp yeast
  • 130g mixed fruit flavoured drinking yogurt
  • 25g egg (about half an egg)
  • 30g butter

Put all ingredients into d ABM & select basic white with light crust. Start.

Sunday, October 25, 2009

Honey Buns

Saw this simple recipe from HHB’s blog & decided to give it a try. However, after reading further on her posting, I decided to reduce d wet ingredients in order to ensure d dough would be more manageable. Sure enough, d finished dough was quite manageable even though I need to flour my hands more often as compared to other bakes. I even managed to put some mini dark chocolate chips inside 1 of d dough.
However, after 2nd proofing, d dough didn’t seems to have rise high enough but am running out of time so I decided to go ahead & bake it. Big mistake cause d buns didn’t seems to raise well after baking. But lucky, d inside of buns were soft & fluffy. However, I cant really taste d honey at all… Not sure if I shd increase d honey portion next time… mmmm…


  • 300g bread flour
  • 4g salt
  • 1 tsp instant yeast
  • 1 egg lightly beaten plus enough milk to make 175g
  • 50g honey
  • 30g unsalted butter
  1. Place all ingredients except d butter into d ABM, select Dough & press start. Add d butter after 8mins into d kneading phase. Let ABM continue until d cycle end (which in my case, inclded d 90mins 1st proofing).
  2. Remove dough & press out d trapped air as give it a few light knead. Divide into 9 equal rounds & cover with cling wrap, leaving it to rest for 10mins.
  3. Flatten each dough & press out d trapped air be4 shaping them into a smooth round ball. (can knead chips or other fruit bits in this phase)
  4. Place dough seam side down onto a 20cm by 20cm square baking tray that’s sprayed with veg oil. Loosely cover with cling wrap & let it proof for 60 mins or until double in size.
  5. Bake at preheated oven at 180C for abt 15-20 mins until the bread is golden brown all over. Cover surface with a sheet of aluminum foil if surface is browning too quickly. Remove from oven, unmold immediately & let cool on wire rack.

Saturday, October 24, 2009

Blueberry Lemon Coffee Cake

Was just browsing ard d web when I chanced upon Kevin’s blog & drawn by some of his bakes. I was very interested in 1 of his BF recipe – Blueberry & Lemon Coffee cake. However, with 2 toddlers ard, am not sure if coffee cake is d right thing for them until I found out that a coffee cake does not necessarily have coffee! D name mainly suggest serving d cake with coffee! Great, since tomorrow is Sunday, I decided to give this recipe a try.
It’s really a very simple cake. However, hubby & MIL prefer me to reduce d amt of sugar so I decided to omit d toppings. Also, as mentioned in my past few bakes, I believed weather temp plays a part in d batter so instead of adding all d milk at 1 go, I pour it in part by part & stop when I feel that d batter is wet enough. So there will be some slight diff betw my ingredients as compared to d originator – Kevin’s.
End result – OMG! It tasted really GOOD! I wld actually considered this a success bake even though it’s flatter as compared against Kevin’s cake given d fact I actually used a smaller pan (8’x8’). I really love it! MIL commented that she can tasted very strong lemon but hubby brushed that aside & said it’s actually very nicely done, very light & fluffy. ;->

Ingredients:
2 cup flour
2 teaspoon baking powder
1/2 teaspoon salt
90g butter (soften)
2/3 cups sugar
2 eggs
100ml milk
1 cup wild blueberries
1 teaspoon grated lemon rind

Directions:
1. Mix flour, baking powder and salt in a bowl.
2. Cream butter & sugar in a bowl.
3. Mix in eggs.
4. Fold d flour mixture & milk into butter/sugar mixture.
5. Fold in blueberries.
6. Pour mixture into a greased 8' x 8' baking pan. Sprinkle grated lemon rind over d top.
7. Bake in a preheated 170C oven for abt 35 mins.
note - Kevin also mentioned this coffee cake freezes well so it can easily be store away in d freezer for another time.

Friday, October 23, 2009

Milo FunnyFaces Cookies

Was directed to this recipe by BH & decided to give it a try tonite. However, with MIL nagging abt giving d 2 toddlers too much chocolate, I decided to try replace with marshmallows instead. But what a horror when I checked d cookies 10mins into d baking process – those cookies that r stuffed with marshmallows r cracking open & marshmallows r flowing out of d dough! (pic1) Yuk!
And even after lowing d temp from 140C to 130C, I noticed that my entire 1st batch was burned only after 15mins in d oven! Argh!
So in d end, I have to throw away d entire 1st batch. For d 2nd batch, I decided to just follow d recipe & insert chocolate chips into d dough.
However, I lower d temp in order to ensure no burned cookies again.

(1)
180g butter, soften at room temp
80g Milo
(2)
200g cake flour
25g corn flour
25g milk powder
(3)
100g chocolate chips
some chocolate rice
some Koko Krunch

Method:
1. Pre-heat oven to 130C. Line baking tray with baking paper and set aside.
2. Sieve (2).
3. Cream (1) be4 adding (2) to form dough.
4. Divide dough into 10g each. Put 3 chocolate chips into each piece of dough & roll into balls.
5. Prepare d faces as u c please.
6. Bake at 130C for abt 20 mins.
7. Leave to cool on wire rack before storing in an airtight container.

Thursday, October 22, 2009

山药豆腐羹_Yam bean curd soup

MIL told my mum abt all d soup recipes that I have been trying out from the web that’s quite beneficial to our health so I went & get another interesting/easy recipe to let my mum try out. Her comment – too blend for her taste bud. Sigh… so diff to please...

山药豆腐羹

材料1
香菇 : 6 – 8朵 (洗净, 泡软后切丁, 保留浸泡的水) dried mushroom, washed, soaked until soft be4 dicing, reserve d water that was soaked
高汤: 适量 broth, moderate quantity

材料2
山药 : 300g (去皮, 切丁) Fresh yam, peel & diced
嫩豆腐 : 1盒 (切成与山药同样大小) tender bean curd – 1box (cut into same size as fresh yam)
盐: 适量 salt: moderate quantity

材料3 (调均成粉浆) mix well
粟米粉 : 1tsp corn flour
水 : 2 tbsp water

材料4
鸡蛋 : 3个 (打散) eggs, beat well
芫荽1 – 2棵 (洗净切末) Coriander, 2 stalks, washed & minced

材料5
胡椒粉 : 适量 pepper: moderate quantity

方法
1) 锅中加入高汤, 冬菇水, 冬菇丁, 煮滚10分钟
Add (1) into pot & boil for 10mins
2) 加入鲜山药丁, 豆腐丁, 续煮5 – 10分钟后, 加盐调味
Add (2) & continue to boil for 5-10mins. Add salt if desired
3) 汤再沸腾时, 用粉浆勾芡至浓稠状, 淋入蛋液并撒香菜末, 胡椒粉即可
Once boiling, thicken with (3) be4 adding (4) & if desired (5) too.

功能
健脾滋肾,能补益身体而不燥,适合一家大小常食用
Strengthen spleen & nourish kidney, replenish d body & yet no too dry/parched. Suitable for whole family (elder or youngster) regular consumption.
尤其天气燥热时或工作忙碌常熬夜,觉疲倦、口干、咽干、手足心热、睡眠不安,大便干燥等
In particular, good to consume on dry/hot weather. Also good for those who:
a) have lots of late nites;
b) feel fatigue often;
c) have dry mouth/throat
d) have heaty/warm hands/legs
e) have un-peaceful/disturbed/restless sleep
f) are constipated; etc

Wednesday, October 21, 2009

Gula Melaka AgarAgar

With 2 toddlers at home, I decided to give this dessert recipe a try after reading abt it from BH’s blog. However, after taking note that my MIL prefer tougher agar agar, I reduced d liquid amt.End result - a tough agar agar, MIL commented too tough & Hayden does not like it. But both my mum & my nephew took 3 pieces each! Guess 1 cant make everyone happy…

Ingredients - Milk Layer
1 tbsp agar agar powder
500 ml water
80g condensed milk

Method
1. Put d water in a saucepan & turn on d heat, then whisk in agar agar.
2. Cook until agar agar is dissolved, then add in d condensed milk.
3. Pour into a cake pan to cool be4 popping into d fridge to set. Once it’s set, use a cutter to cut out the pattern & remove d cut-out with a toothpick. Lease aside in another bowl. Put both back into d fridge while you prepare d brown layer.

Ingredients - Brown layer
7g agar agar powder
600 ml water
100g
gula melaka
35g sugar

1. Boil all d ingredients together until dissolved.
2. Pass ½ of d mixture through a fine sieve onto d prepared milky layer pan. Pop back into fridge to harden.
3. Place d previous milky cut-out shapes into small jelly moulds & fill up with bal brown layer. Leave to cool be4 putting into fridge to set.
Once set, remove from pan/mold & serve.

三杯鸡_SanBeiJi

With my mum & nephew in town, I went surfing for something interested to try out & decided on this recipe from Baking Mum. And in order to explain why this dish was called 三杯鸡, I went online to locate the story behind this dish & found out that there r many versions on the origins of 三杯鸡. However, the name was derives from the 3 cups of sauces required – soy sauce, rice wine & sesame oil. Even though it does not really required 1 cup each. But I decided that this is d best way to explained to 2 toddlers.

End result - both MIL & mum commented that more wine shd be added.

Ingredients:

  • 800g boneless ckn thigh
  • 10 slices ginger
  • 15 cloves garlic
  • 2 stalk spring onions (cut into 2 inch pieces)
  • Branch of basil leaves

Seasonings:

  • 45 ml sesame oil
  • 45 ml light soy sauce
  • ¼ cup Chinese cooking wine + 2-3tbsp for serving
  • 1½ tbsp sugar (can change depending on 1 preference of sweetness)
  • 1½ tbsp mirin
  • 1½ tsp cinnamons
  • ¼ tsp five spice powder
  • 1 tbsp tomato ketchup
  • 1 tbsp apple vinegar
  1. Place ginger, spring onions, chilli at d bottom of a pot.

  2. Place chkn piece on top be4 pouring all the seasonings ingredients into d pot.

  3. Cook chicken uncovered for abt 15 mins over high heat.

  4. Add in bunch of basil, cover pot & continue to cook until sauce thickens. D thickness of d sauce r dependable on individual’s preference. Turn off fire once that right thickness is reached.

  5. Sprinkle more wines into d pot & stir well be4 serving.